
E-Bike Hydraulic Brake Maintenance: A Complete Guide
Quick answer: To maintain e-bike hydraulic brakes, check pad thickness and rotor condition often, keep rotors clean, make sure the lever feels firm, and bleed the brakes about once a year, or sooner if the lever feels spongy. Always use the fluid your brake maker names. E-bikes are heavier and faster than normal bikes, so their brakes wear faster.
Why e-bike brakes need more care
An e-bike weighs more than a normal bike and carries more speed. That means:
- More heat when you brake
- Faster pad and rotor wear
- Less room for error on a long downhill
Good brakes are a safety item, so don’t skip maintenance.
How hydraulic brakes work
You squeeze the lever. Fluid moves through a sealed hose to the caliper. The caliper pushes the pads onto the rotor (the metal disc). Friction slows the wheel.
Air in the line, dirty rotors, or worn pads all make this process weaker.
Check your fluid type first
This is the most important rule in this guide.
| Fluid type | Used by (examples, check your manual) |
|---|---|
| Mineral oil | Shimano, Magura, many Tektro models |
| DOT fluid (DOT 4 or 5.1) | SRAM, Hayes, many others |
- Never mix them. The wrong fluid can damage the seals and cause brake failure.
- Read the manual or the lever markings. If unsure, ask a shop.
Tools and supplies
- Torx and Allen keys
- Torque wrench
- Brake bleed kit for your brake brand
- The correct brake fluid
- Isopropyl alcohol (90% or higher) and clean, lint-free rags
- Disc brake cleaner (made for bikes)
- Plastic tyre lever or a piston press tool
- New pads and a pad spacer
- Nitrile gloves
Maintenance schedule
These are general guides. Heavy riders, hilly areas, and wet weather mean shorter gaps. Your brake maker’s manual always wins.
| When | What to do |
|---|---|
| Before each ride | Squeeze both levers. They should feel firm. Look for leaks. |
| Every 2-4 weeks | Check pad thickness. Wipe the rotors. Look at the hoses. |
| Every 3 months | Check bolt tightness. Clean the caliper. Check rotor wear. |
| Every 6-12 months | Bleed the brakes. Replace pads if worn. |
| After a crash or hard fall | Check levers, hoses, rotor, and caliper. |
Step-by-step maintenance
1. Check pad wear
Look into the caliper. If the pad material is about 1 mm thick or less, replace the pads. Many makers give their own limit, so check your manual. Replace pads in pairs.
Tip: E-bike riders who brake hard or ride downhill should consider sintered (metal) pads. They last longer and handle heat better, but they can be noisier. Organic (resin) pads are quieter but wear faster.
2. Inspect the rotor
- Look for deep scratches, blue marks (heat), or a bent disc.
- Find the minimum thickness stamped on the rotor. Replace it if it’s close to that number or below.
- Spin the wheel. A rotor that wobbles can rub the pads.
3. Clean the rotors and pads
- Spray the rotor with isopropyl alcohol or bike disc brake cleaner.
- Wipe with a clean rag.
- Do not touch the rotor with greasy hands.
- Never spray chain lube or other oil near the brakes.
Oil on pads? Oily pads rarely recover. Replace them and clean the rotor.
4. Check for leaks and hose damage
Look at the lever, hose, and caliper for wet spots or oily residue. Check the hose for cuts, kinks, or rubbing. A leaking brake is not safe to ride. Get it repaired first.
5. Align the caliper
If a pad rubs the rotor:
- Loosen the two caliper bolts slightly.
- Squeeze the lever and hold it, so the caliper centers over the rotor.
- Tighten the bolts while holding the lever.
- Spin the wheel to check.
Use the torque value in your manual. Over-tightening can damage the frame or fork.
6. Clean and free sticky pistons
If one pad sits closer than the other, a piston may be stuck.
- Remove the wheel and pads.
- Clean around the pistons with a cotton swab and isopropyl alcohol.
- Gently push the pistons back with a plastic tool. Never use a metal screwdriver on the pistons.
- Put the pad spacer in before you touch the lever.
7. Replace the pads
- Remove the wheel.
- Take out the retaining pin or bolt and the old pads.
- Push the pistons back evenly.
- Fit the new pads and the spring.
- Refit the wheel and squeeze the lever a few times until it feels firm.
Safety: Never squeeze the lever with the wheel off. The pistons can pop out and the brake may need a full bleed.
8. Bed in new pads
New pads and rotors need bedding in. This lets the pad material spread evenly on the rotor.
- Find a safe, flat place.
- Ride up to a moderate speed.
- Brake firmly (not a lock-up) until you almost stop.
- Repeat about 20 times.
Follow your brake maker’s exact bedding steps if they differ.
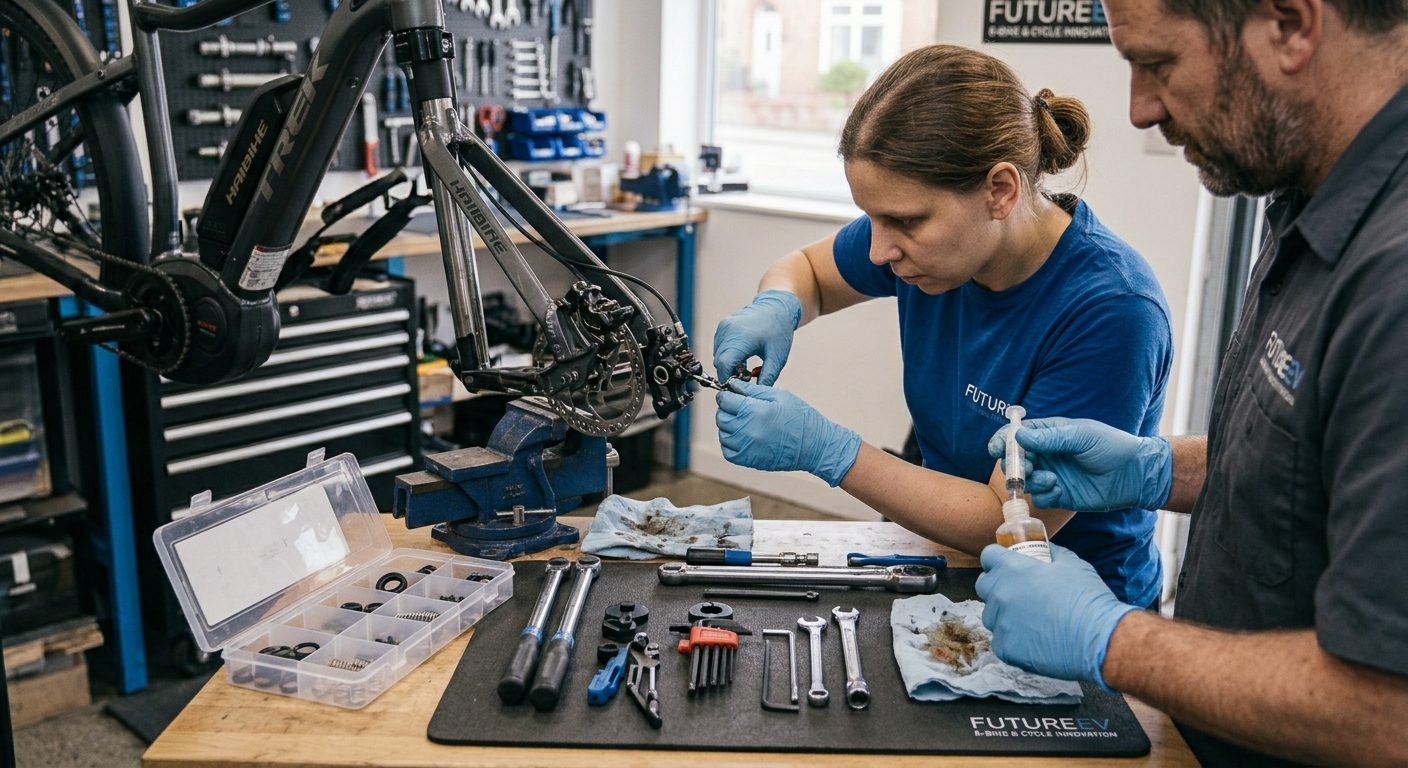
9. Bleed the brakes
Bleeding removes air bubbles from the fluid. Air makes the lever feel soft.
Signs you need a bleed:
- The lever feels spongy
- The lever pulls close to the handlebar
- Braking feels weaker, but the pads are fine
The basic idea (steps differ by brand, so follow the maker’s guide):
- Put the bike on a stand. Set the lever flat.
- Attach the bleed syringes.
- Push new fluid through to push out the old fluid and air.
- Tap the hose and lever to free bubbles.
- Close the system, clean off any fluid, and check the lever feel.
- Wipe everything with isopropyl alcohol. Do not let fluid touch the pads or rotor.
DOT fluid can damage paint and irritates skin and eyes. Wear gloves and eye protection. Do not let it touch your frame.
New to bleeding? It is easy to make mistakes. A good bike shop can do this quickly.
Troubleshooting
| Problem | Likely cause | Fix |
|---|---|---|
| Spongy lever | Air in the system | Bleed the brakes |
| Lever pulls to the bar | Air or worn pads | Check pads, then bleed |
| Squealing | Dirty rotor or pads, glazed pads, loose caliper | Clean, re-bed, or replace pads |
| Rubbing noise | Caliper off-center or bent rotor | Realign the caliper or true the rotor |
| Weak braking | Worn or oily pads, or air | Replace pads or bleed |
| Lever sticks | Dirty pistons or a damaged hose | Clean pistons and inspect the lever |
| Oil or fluid on the brake | Leak | Stop riding. Get a repair. |
E-bike extras
- Brake sensors: Some e-bikes cut the motor when you squeeze the lever. If your motor doesn’t cut off, check the sensor and its cable. Don’t bypass it.
- Rotor size: Many e-bikes use larger rotors for better heat control. Match your rotor to what the brake and frame allow.
- Transport: Don’t lay the bike on its side for long periods. Don’t squeeze the levers while it’s on a car rack.
- Electrical safety: Remove or power down the battery when you work near the motor and wiring.
When to see a mechanic
Go to a shop if:
- The brake leaks fluid
- The lever still feels soft after a bleed
- Rotors are bent or worn past the minimum
- You’re unsure which fluid your brake uses
- You don’t have the right tools or torque wrench
Hydraulic brakes are a safety system. It’s okay to ask for help.
FAQ
How often should I bleed e-bike hydraulic brakes?
About once a year for most riders. Riders who brake hard or ride in hills and wet weather may need it every 6 months. Bleed sooner if the lever feels spongy.
How do I know if my e-bike brake pads are worn?
If the pad material is about 1 mm thick or less, replace them. Squealing, weak braking, or metal-on-metal noise are other signs.
Can I use any brake fluid?
No. Use mineral oil or DOT fluid, whichever your brake needs. Never mix them.
Why does my e-bike brake lever feel spongy?
Air in the system is the most common cause. Bleed the brakes. Also check for leaks.
Why are my e-bike brakes squealing?
Common causes are dirty rotors, oily pads, glazed pads, or a loose caliper. Clean the rotor, check the pads, and make sure the caliper is aligned.
How long do e-bike brake pads last?
It depends on rider weight, terrain, weather, and pad type. E-bike pads often wear faster than normal bike pads. Check them often, not by distance.
Can I fix oily brake pads?
Usually not. Replace the pads and clean the rotor.
Are hydraulic brakes better than mechanical ones on e-bikes?
Hydraulic brakes need less hand force and give better control, which helps on heavy bikes. They need more care when it comes to bleeding and fluid.
Final checklist
- Lever feels firm
- Pads have material left
- Rotors are clean and straight
- No leaks
- Caliper bolts torqued to spec
- Test ride at low speed in a safe place
Ready for a new ride? Browse e-bikes.